Peptide Injection Guide
By Charles Kamen, MD, board-certified neurologist

Most therapeutic peptides are injected subcutaneously - into the fat layer just beneath the skin - using a short, fine needle you can self-administer at home. Done with clean technique, rotated sites, and physician oversight, it is a fast, low-discomfort routine. [1]
Dr. Charles Kamen, MD, board-certified neurologist at LiveNow Longevity in Las Vegas, provides hands-on injection training to every peptide therapy patient so self-administration stays safe, sterile, and consistent. The specifics differ by compound - our Peptides A–Z directory covers each physician-reviewed peptide individually. Individual results vary.
What Is the Correct Way to Inject Peptides?
Nearly all peptides used in therapy are given subcutaneously - deposited into the fat layer beneath the skin rather than into muscle or vein. This route provides steady, reliable absorption, uses a very small needle, and is simple enough for patients to self-administer once trained. [1]
The subcutaneous fat acts as a slow-release depot, letting the peptide absorb gradually rather than all at once, and it avoids the deeper needle placement and added discomfort of intramuscular injection. The common landing zones - abdomen, thigh, and upper arm - all have an accessible fat layer that makes self-injection practical.
Which Injection Site Should You Choose?
The abdomen, thigh, and upper arm are the standard subcutaneous sites, and the best choice is the one you can reach easily, see clearly, and rotate reliably. Each offers a different trade-off in access and comfort, and moving between them protects the tissue over time.
- Abdomen: Easy access and good absorption - inject about 2 inches from the belly button, avoiding the navel itself.
- Thigh: Convenient for self-injection and easy to see, using the front and outer portion of the upper leg.
- Upper arm: Good absorption but harder to reach alone - often needs a partner or a shorter needle.
- Rotation: Systematically rotate between sites to protect the tissue, preserve absorption, and prevent scarring.
How the Three Injection Sites Compare
The three standard sites are not interchangeable. They differ in how easily you can reach them one-handed, how much subcutaneous fat is usually available, and what tends to go wrong. Most patients settle on the abdomen as their primary site and use the thighs as the rotation partner.
| Site | Reaching it alone | Fat layer | Best for | Watch out for |
|---|---|---|---|---|
| Abdomen | Easiest - you can see the site clearly | Usually the most generous | Primary everyday site for most patients | Stay roughly two inches clear of the navel |
| Thigh | Easy - front and outer upper leg | Reliable in most adults | The natural rotation partner to the abdomen | Avoid the inner thigh and the knee end |
| Upper arm | Hardest - often needs a second person | Thinner; varies most between people | Adding a third area to a rotation | Easy to go too deep if the fat layer is thin |
Why Site Rotation Matters
Rotating injection sites prevents lipodystrophy - changes in the fat tissue that alter how reliably a peptide absorbs - as well as the buildup of scar tissue. Repeatedly injecting the same spot lets that tissue harden or thicken, so a dose that lands there may absorb unpredictably. [2]
Dr. Kamen recommends tracking your sites and rotating on a set pattern so every spot has time to recover between injections, keeping absorption - and therefore your dosing - consistent from week to week.
A Simple Four-Week Rotation Schedule
The point of a rotation is that no patch of tissue is used twice in quick succession. The grid below is the pattern Dr. Kamen's team teaches most often for a once-weekly injection: work left to right, then start again. Within each area, move about an inch from your last spot rather than reusing the exact same point.
If you inject more than once a week, keep the same left-right alternation and simply move through the areas faster. Writing the site down - on paper or in your phone - is the part most people skip and the part that makes the rotation actually work.
| Week | Area | Side | Note |
|---|---|---|---|
| Week 1 | Abdomen | Left | Stay about two inches clear of the navel |
| Week 2 | Thigh | Left | Front and outer surface of the upper leg |
| Week 3 | Abdomen | Right | Move roughly an inch from the week 1 spot |
| Week 4 | Thigh | Right | Then return to week 1 and repeat |
What Supplies Do You Need?
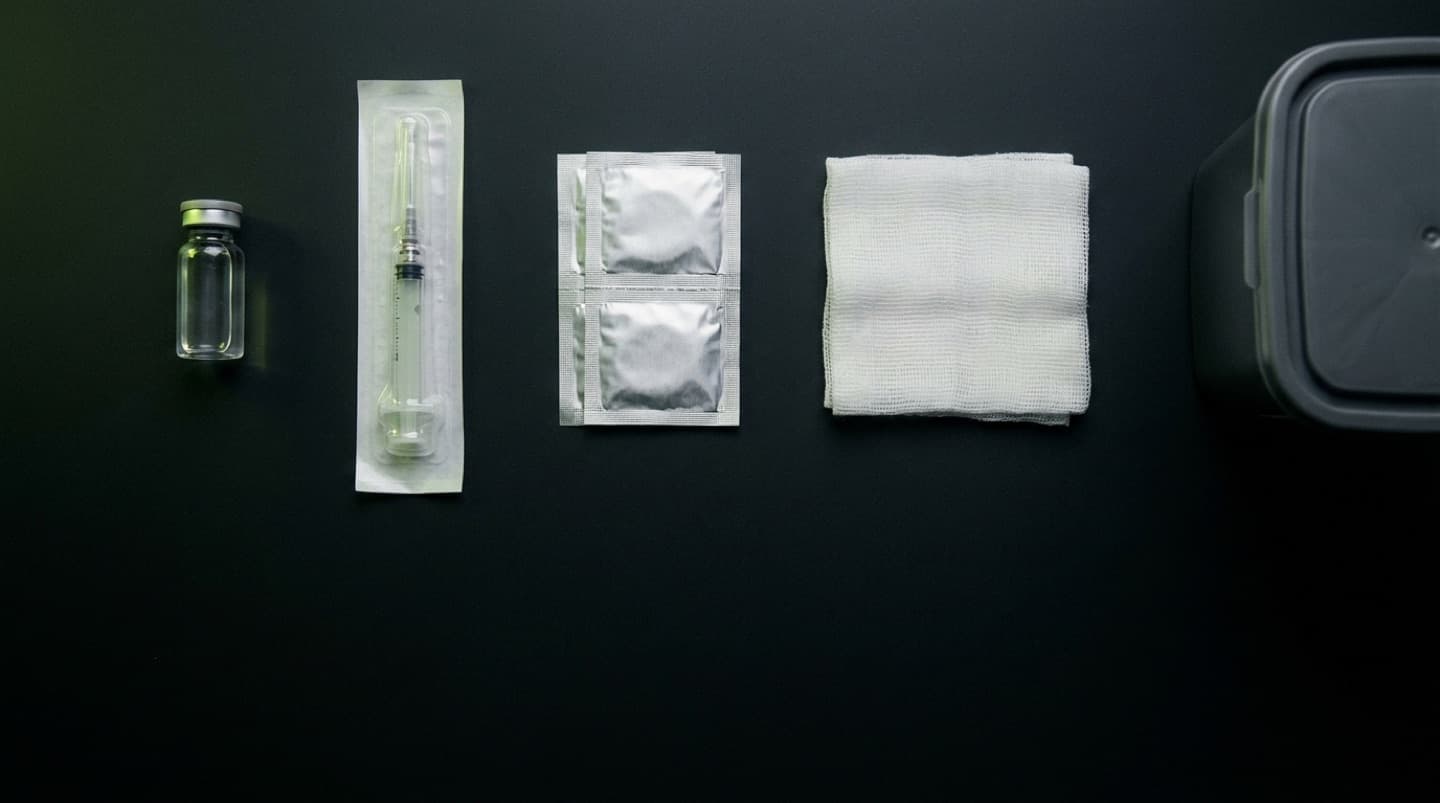
Gather everything before you start. Stopping halfway through to hunt for an alcohol swab is how sterile technique breaks down, and it is the most common avoidable mistake we see in training sessions.
Your prescription determines the specifics - needle length in particular depends on your body composition and on the medication, so use what Dr. Kamen's team has specified for you rather than what a forum recommends.
- The prescribed medication, in its original labeled container.
- Syringes or pen needles of the type and size your physician specified.
- Alcohol swabs - enough for the vial top and the skin, with spares.
- Clean gauze or a cotton ball for gentle pressure afterwards.
- An FDA-cleared sharps container, within arm's reach before you begin.
- If you are reconstituting: the correct diluent, exactly as prescribed.
How Do You Reconstitute a Peptide?
Most peptides arrive as a lyophilized (freeze-dried) powder that must be reconstituted with sterile water before use. You add the water gently, let the powder dissolve on its own without shaking, then draw the solution back into the syringe - all using clean, aseptic technique to protect the peptide and prevent contamination.
- Wash your hands thoroughly before handling any supplies.
- Use alcohol swabs to clean the vial tops and the injection site.
- Draw sterile water slowly into the syringe.
- Inject the water into the peptide vial and let it dissolve naturally - do not shake, as agitation can damage the peptide.
- Draw the reconstituted peptide back into the syringe.
- Tap the syringe to bring air bubbles to the top and expel them.
What Does Proper Injection Technique Look Like?
Good technique means clean hands and skin, a pinched fold of fat, a controlled needle angle, and a slow, steady push on the plunger. Careful, unhurried technique reduces bruising, leakage, and injection-site reactions, and keeps each dose landing in the fat layer where it belongs. [3][4]
- Pinch the skin at the injection site between your thumb and forefinger.
- Insert the needle at a 45-90 degree angle, depending on your body composition and needle length.
- Inject the peptide slowly - do not force the plunger.
- Withdraw the needle and apply gentle pressure with a clean gauze pad.
- Do not rub the site afterward - pressure without rubbing helps limit bruising.
Troubleshooting Common Injection Problems
Nearly every problem new patients bring to us traces back to one of a handful of causes, and most are fixed by slowing down. Use this as a first check, and contact the clinic for anything that does not resolve or that keeps recurring at the same site.
| What you notice | Usual cause | What to do |
|---|---|---|
| A drop of liquid leaks out as you withdraw | The needle came out too quickly, or the injection was too shallow | Pause a few seconds before withdrawing, and check your angle and needle length with the clinic |
| Bruising at the site | A small vessel was nicked, or the site was massaged afterwards | Apply gentle pressure without rubbing, and rotate away from that spot |
| Stinging during the injection | Injecting too fast, or the solution is still cold from the fridge | Push the plunger slowly and let the dose reach room temperature first |
| A lump or hardened patch that persists | Repeated injection into the same tissue | Stop using that area and tell your physician - this is what rotation exists to prevent |
| Redness, warmth, swelling, or fever | Possible infection | Contact the clinic promptly. Do not keep injecting into that site |
Storing and Handling Your Medication
Storage is where a correctly performed injection can still be undermined. Heat, light, and freezing all degrade injectable medications, and a degraded dose does not announce itself - it simply works less well than it should.
Always follow the storage instructions on your own label, which take precedence over any general guidance. The table below covers the pattern most of our patients are working with.
| Stage | Where it belongs | Discard it if |
|---|---|---|
| Unmixed or unopened | Refrigerated, in the original carton, away from light | It is past the expiry date on the label |
| After mixing or first use | Refrigerated for the period your label specifies | That period has elapsed, whatever the vial looks like |
| Any stage | Never in the freezer, never on a sunny windowsill | It looks cloudy or discoloured, or has particles floating in it |
| Travelling | Hand luggage, in an insulated cooler with a cold pack | It has been left at room temperature longer than the label allows |
What the FDA Labels Say About Sites and Timing
The injectable medications patients most often self-administer are the approved weight-management and diabetes therapies, and their FDA-approved labels state exactly which sites are permitted, how often to inject, and how long the missed-dose window is. Those instructions are public, and they are worth reading rather than guessing at.
The table below reports what the current labels say. It is a summary of published labelling, not a dosing recommendation for you - your own prescription, and the dose Dr. Kamen sets with you, always governs.
| Medication | Frequency | Sites named in the label | Missed dose window | Labeled maximum |
|---|---|---|---|---|
| Semaglutide for weight reduction (Wegovy)[5] | Once weekly, same day each week, with or without meals | Abdomen, thigh, or upper arm - rotate sites with each dose | Not specified in the same terms as the others | 7.2 mg once weekly |
| Tirzepatide for weight reduction (Zepbound)[6] | Once weekly | Abdomen or thigh for self-injection. The back of the upper arm is for injection by another person, not by you | Within 4 days (96 hours) | 15 mg once weekly |
| Semaglutide for type 2 diabetes (Ozempic)[7] | Once weekly, same day each week, with or without meals | Abdomen, thigh, or upper arm - use a different site each week within the same region | Within 5 days | 2 mg once weekly |
What Should You Expect in the First Month?
Self-injection is a skill, and like any skill it feels awkward before it feels routine. Knowing roughly how the first few weeks tend to go stops normal early clumsiness from being mistaken for something going wrong.
Week One - the awkward one
The first injection is almost always the hardest, and it is usually anticipation rather than pain that makes it so. Expect to be slow, to double-check every step, and to feel unsure about the angle. Patients frequently report the actual sensation was milder than they had braced for.
This is the week to inject with your training materials in front of you rather than from memory.
Weeks Two and Three - building the routine
Technique starts to settle. Most patients find a preferred site and a time of day that fits their week, and the whole process drops to a couple of minutes. This is the point at which the rotation record matters, because injections now happen quickly enough that it is easy to lose track of where the last one went.
Minor redness or a small bruise now and then is common and not a cause for concern on its own.
Week Four - reviewing with your physician
By the end of the first month you should have a clear picture of how your sites are tolerating the routine and whether anything needs adjusting. Bring your rotation record to your follow-up. Dr. Kamen reviews technique alongside your response to therapy, because a tolerability problem is sometimes a technique problem rather than a dosing one.
Why Does Peptide Injection Require Physician Oversight?
Peptides are prescription therapies, and safe self-injection depends on correct dosing, sterile handling, and monitoring for side effects - all of which belong under a physician's care. Training alone is not enough if no one is tracking how you respond and adjusting the plan.
Dr. Kamen pairs hands-on injection training with ongoing follow-up, so your technique, storage, and dose stay correct as therapy progresses. That oversight is what turns a home injection routine into genuinely safe self-administration rather than guesswork.
Key Takeaways
- Subcutaneous injection into the fat beneath the skin is the standard route for peptide therapy.
- Standard sites are the abdomen, thigh, and upper arm; rotating between them prevents lipodystrophy and absorption problems.
- Lyophilized peptides are reconstituted with sterile water, added gently and left to dissolve without shaking.
- Pinch the skin, insert at a 45-90 degree angle, inject slowly, and do not massage the site.
- Clean, aseptic technique reduces bruising, leakage, and injection-site reactions.
- Dr. Kamen provides hands-on injection training and physician oversight for every peptide patient in Las Vegas.
Common Questions
Does it hurt to inject peptides?
Most patients report only minimal discomfort. Subcutaneous needles are very short and fine, and injecting into the soft fat layer with a sharp, high-quality needle keeps sensation low. Any brief stinging usually fades within seconds, and for most people the process becomes routine after the first few sessions.
Can I inject in the same spot every time?
No. Injecting the same spot repeatedly can cause lipodystrophy - changes in the fat tissue - and scar formation, both of which alter how the peptide absorbs. Use a systematic rotation across the abdomen, thigh, and upper arm, tracking your sites so each one has time to recover between injections.
What if I hit a blood vessel?
If blood appears in the syringe when you draw back or inject, withdraw the needle and apply gentle pressure with clean gauze. Choose a fresh site and a new needle for the actual injection. Occasional minor bleeding is common and harmless, but persistent bleeding or bruising is worth mentioning to Dr. Kamen's team.
How do I store my peptides?
Unmixed, lyophilized peptides generally require refrigeration to stay stable, while reconstituted peptides keep for varying periods depending on the formulation. Store them away from light and heat, and never use a solution that looks cloudy or discolored. Dr. Kamen's team provides specific storage instructions for each peptide you are prescribed.
What if I have trouble self-injecting?
Dr. Kamen's team provides hands-on training and can schedule practice sessions until self-injection feels comfortable. Some patients have a partner assist, and others come to the Las Vegas clinic for administration. Physician oversight means you are never left to figure out technique, dosing, or troubleshooting entirely on your own.
Can I travel with my peptides?
Yes, with proper documentation. Dr. Kamen's team provides travel letters, prescription paperwork, and guidance on keeping refrigerated peptides at a safe temperature using an insulated cooler or cold pack. Carry supplies in your hand luggage, keep them in original labeled packaging, and check airline and destination rules before you go.
How do I dispose of used needles safely?
Put every used needle and syringe straight into an FDA-cleared sharps container immediately after the injection - never into household rubbish or recycling, and never recap a needle by hand. Keep the container within reach before you start so you are not carrying an exposed needle across the room. Disposal rules for a full container vary by state, and Dr. Kamen's team can point you to the correct drop-off or mail-back option for Nevada.
What should I do if I miss a dose?
Contact the clinic rather than improvising. Do not take two doses at once to make up for a missed one - doubling up is the single most common self-correction we have to undo, and it can change how you tolerate the therapy. What to do depends on your specific medication and how much time has passed, which is exactly the kind of question your physician can answer in a minute.
Can I inject through my clothing?
No. It is occasionally described as a shortcut, but it defeats the point of cleaning the skin, prevents you from seeing the site you are injecting into, and can drag fibres toward the needle track. It also makes it impossible to check afterwards for bleeding or a developing lump. Expose the site, clean it, and inject into bare skin.
Should the medication be cold when I inject it?
Injecting straight from the refrigerator is a common cause of stinging. Most patients find it noticeably more comfortable to let the dose sit out and reach room temperature first. Follow your own label for how long that is safely allowed, and never warm a medication in a microwave, in hot water, or on a radiator - heat degrades it.
Correct injection technique is the foundation of safe peptide therapy, and most patients can learn it with proper training and physician oversight. Schedule a consultation with Dr. Kamen for hands-on injection training and ongoing peptide therapy management.
References
- Frid AH, et al. New Insulin Delivery Recommendations. Mayo Clin Proc. 2016;91(9):1231-1255.
- Klonoff DC, Berard L, Franco DR, et al. Mayo Clin Proc. 2025;100(4):682-699. (FITTER Forward expert recommendations on injection technique and site rotation).
- Wong AKC, Chu RYK, Nan Y, et al. J Adv Nurs. 2025;81(11):7361-7373. (Injection techniques to reduce adverse effects of subcutaneous injection).
- Saltiel-Berzin R, Cypress M, Gibney M. Diabetes Educ. 2012;38(5):635-643. (Translating the research in injection technique: implications for practice).
- Wegovy (semaglutide) injection - FDA-approved prescribing information, label revised 6/2026. DailyMed, U.S. National Library of Medicine.
- Zepbound (tirzepatide) injection - FDA-approved prescribing information, label revised 4/2026. DailyMed, U.S. National Library of Medicine.
- Ozempic (semaglutide) injection - FDA-approved prescribing information, label revised 5/2026. DailyMed, U.S. National Library of Medicine.
Have a question about your situation?
Bring your questions and recent history to board-certified neurologist Dr. Charles Kamen, MD. The evaluation is $88 and is applied toward your protocol if you continue care.